
"It is the child's way of learning. This is the path he follows. He learns everything without knowing he is learning it, and in doing so he passes little by little from the unconscious to the conscious, treading always in the paths of joy and love."
- Maria Montessori
Whether you're looking to make a heart ornament, a world globe ornament, or a mixture of both to decorate your home, this tutorial will show you how to make a hanging heart-shaped pillow in your homeschool.
It covers basics, such as needle threading and picking a heart pillow sewing pattern, all the way to cord making with a lucet. Sewing lessons are part of the Montessori Practical Life curriculum.
Our daughter's busy little hands are gaining strength and coordination, developing muscle memory, and perfecting her pincer grasp with each experience. In addition to crafting an original work that celebrates her love for her mapophile dad and their shared love of geography, our preschooler is also laying the groundwork necessary for handwriting.
Disclosure of Material Connection: Some of the links in the post are "affiliate links." This means if you click on the link and purchase the item, I will receive an affiliate commission. Amazon links are not affiliate links. You can read my full affiliate disclosure.
What is a Lucet?
The Lucet, which originated from the Vikings, is recommended for ages 4 and up. It is a really neat tool for making bracelets, belts, decorative rope, etc. while encouraging concentration, coordination, and fine motor skills. They are great for keeping little hands busy during circle time or read alouds.
Our preschooler sometimes enjoys using yarn that changes color with her lucet so that she can create multi-colored pieces with one skein. We chose a neutral color cord for this project so that the heart and the map appliques would remain the focus of attention.
We used a cord instead of something like a braid to create the hanging loop for this project, because cords are much more durable. You can even cut a cord and it won't unravel, unlike with a braid.
Some Background
We chose to combine our love of hearts and Montessori Geography for this project, but this work could easily be adapted to showcase a heart with other embellishments or a traditional spherical globe. We have been learning about map projections and our preschooler decided to project one onto a heart as a display of her affection for her dad.
You can also find this activity in our 12 Winter Bucket List Activities for Homeschool with Printables.
World Globe Heart Pillow
Sewing is a labor of love that builds concentration and patience. She spent several days working on this heart shaped pillow. Below you'll notice the work is presented and displayed on a Montessori tray to entice interest as well as to provide a safe space for storing between sessions, typical of a Montessori environment.
Wondering How to Organize Sewing Materials?
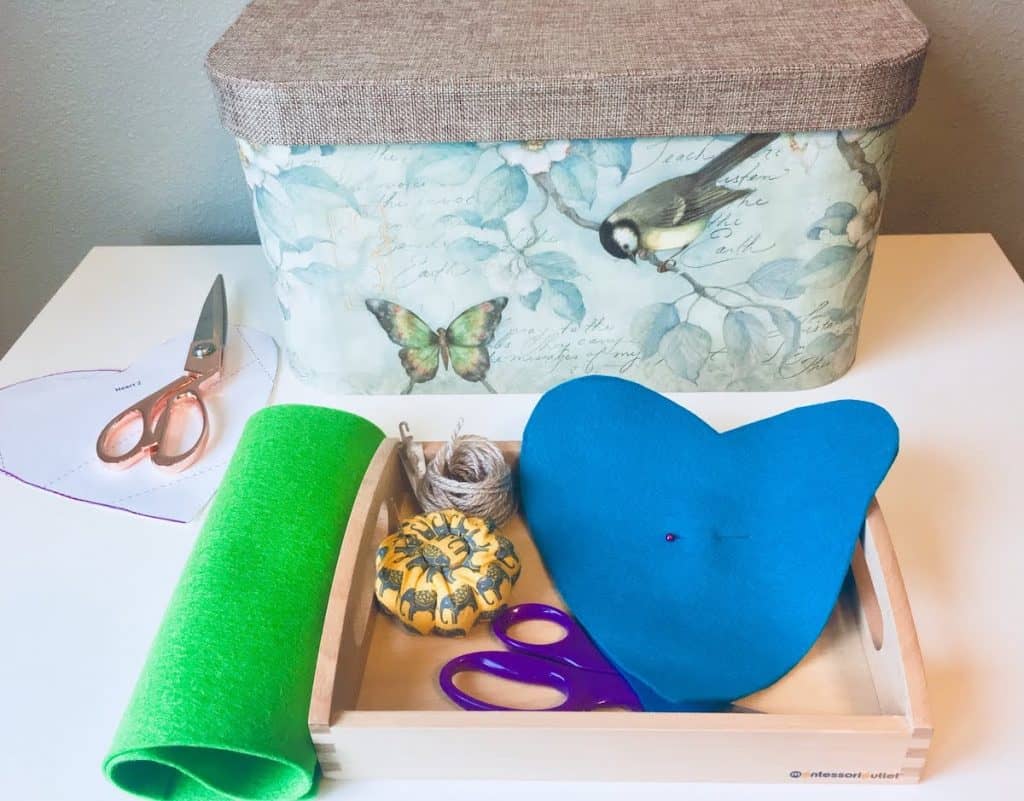
We keep most of the materials we use in this beautiful craft box that my parents gifted to me when I was pregnant with my oldest. It came with a bunch of knitting goodies in it, some of which we are still using to this day. It has housed several special projects over the last few years as they were in progress. As a result, I have really come to appreciate the durability and beauty of this box. It's a lovely piece of art on its own and we really enjoy having it on our shelves.
A sewing box or basket is also a great way to build up and store a small collection of yarn, needles, and accessories without going overboard. Right now, we have an assortment of sport, double knitting, worsted, and bulky weight yarns in a variety of colors and fibers. In addition, we also keep inside colorful embroidery floss, knitting needles in various sizes, crochet hooks in various sizes, sewing needles, a pincushion, a needle threader, a sewing board, and our lucet. It sounds like a lot but many of the items are small and it's a diverse enough collection of essentials to keep our family interested.
Items currently in use by our children are displayed on a tray between sessions. Wool felt, scissors, buttons, and other types of craft embellishments are kept in our more general craft supply basket. Our heart pillow sewing pattern came from Felt with Love: Felt Hearts, Flowers, and Much More.
Materials You Will Need:
- Heart Pattern (optional)
- Continents Pattern
- Wool Felt (including 2 different blues and Montessori continent colors)
- Craft Scissors
- Pin to Secure Felt
- Double Knitting Yarn
- Gold Eye Felt Sewing Needle
- Needle Threader
- Pincushion
- Child's Safety Scissors
- Small Montessori Tray
- Eco Wool Batting
- Nontoxic Craft Glue
- Lucet
- Blue Embroidery Floss
How to Make a Hanging Heart Pillow
Step 1: Cut 2 Heart Shapes from Felt
- Using the heart pattern, the child will trace the heart shape (or freehand) onto two pieces of blue felt (light and dark blue) and cut them out. This doesn't have to be a really precise cut because the hearts will be turned inside out and shaped using the child's fingers after they are sewn together.
- Assist the child as needed to secure the hearts together with a pin and placed them on the tray with the other sewing materials.
Step 2: Thread the Needle
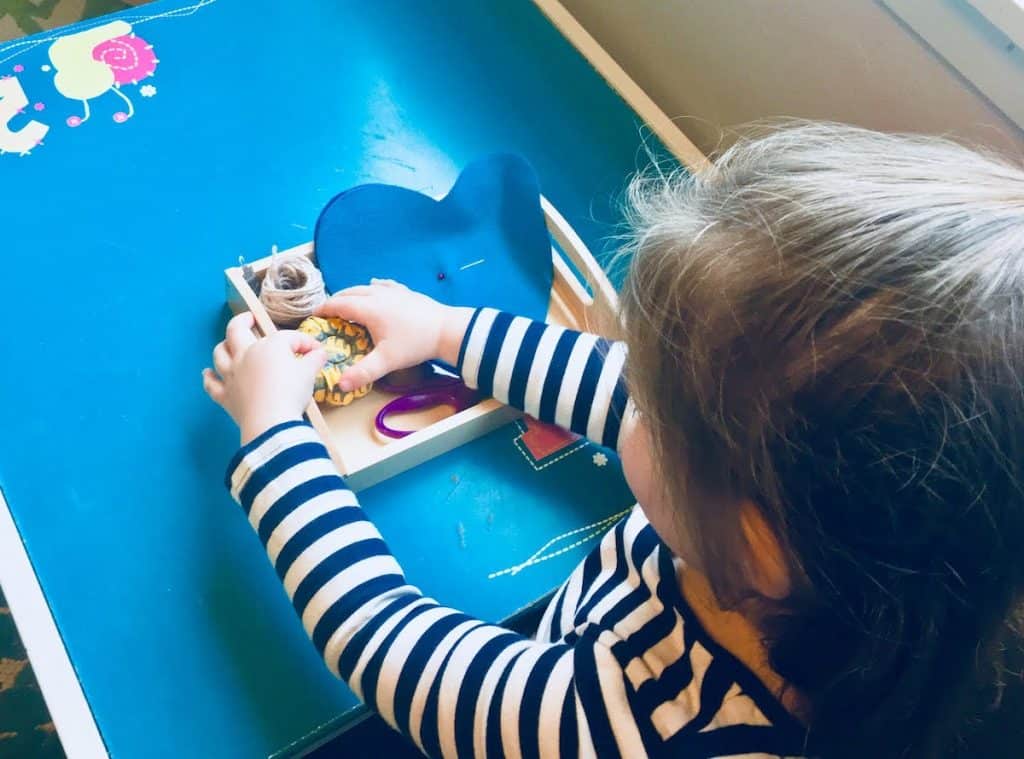
- The child will use the needle threader to thread the felt sewing needle. Having a pincushion that attracts the child's interest may help for this step. The pretty gold elephant pincushion and the excitement of using a felt sewing needle made this very enticing work for our preschooler.
- Afterwards, the child can create a knot at the ends of the thread. If this skill has not yet been mastered, you may want to assist during this part of the work.

Step 3: Begin Sewing
- Push down through the light blue, pull. Up through the dark blue, pull. We used this narrative to guide the work of the running stitch.
- When your preschooler is done with this work for the day, they can return the needle to the pincushion and place both the pincushion and their work back on the tray. Our tray was placed on a high shelf to keep out of the reach of some other small, curious hands.
Step 4: Finish Making the Heart
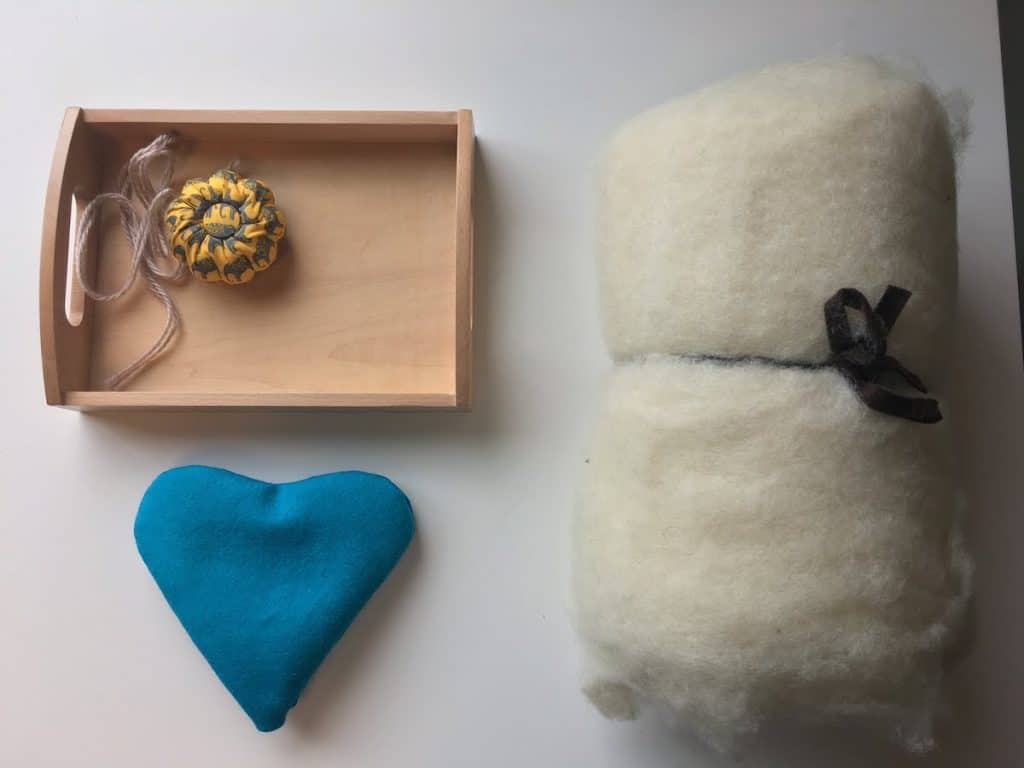
- During the next session, the child will sew the perimeter of the hearts together, leaving just enough space (approx. 2″) to reverse the heart so the stitches are inside and stuff with wool batting. Our daughter's small fingers were perfect for this task and she didn't require any of the tools that adults typically use to accomplish the same thing.
- Once satisfied with the amount of wool batting inside, the child will work the seams of the heart to create the desired shape.
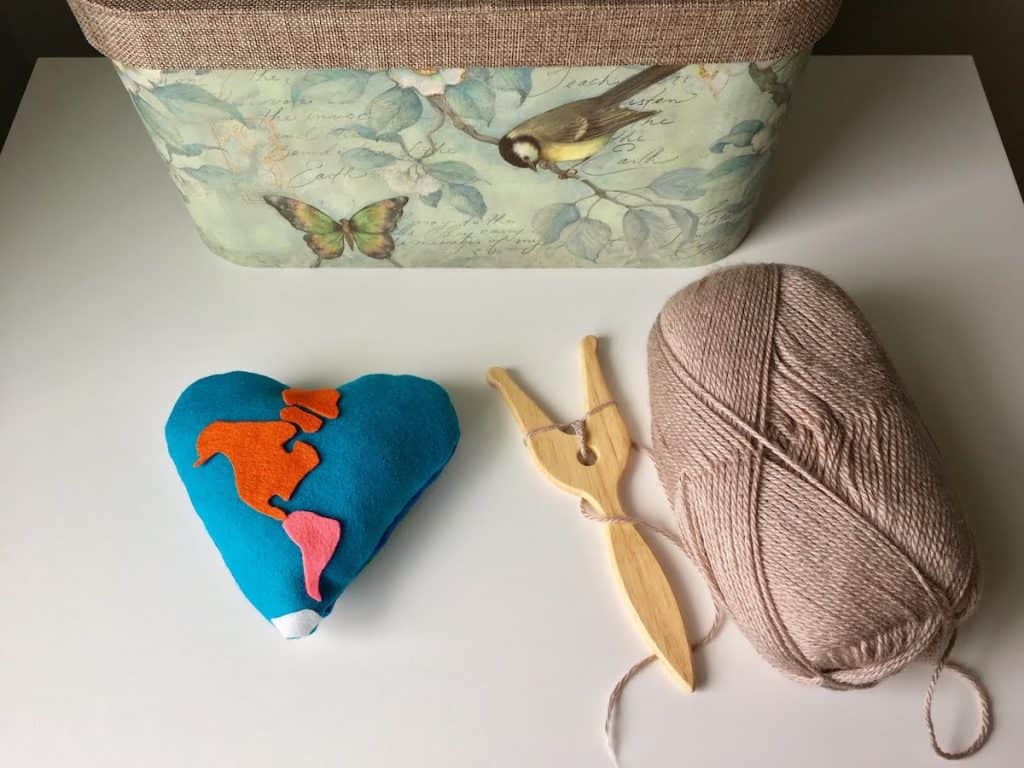
- Use craft glue to seal the remaining 2″ opening and glue the continent appliques to each side of the heart. (An older child may choose to sew these appliques on for added detail.
Our preschooler has recently begun working with a Lucet, or knitting fork, to make cords and bracelets. The Lucet, which originates from the Vikings, is recommended for ages 4 and up. It is a really neat tool for making bracelets, belts, decorative rope, etc. while encouraging concentration, coordination, and fine motor skills. They are great for keeping little hands busy during circle time or read alouds. Our preschooler sometimes enjoys using yarn that changes color with her lucet so that she can create multi-colored pieces with one skein. We chose a neutral color cord for this project so that the heart and the map appliques would remain the focus of attention.

Step 5: Making the Cord
Our daughter is left-handed (she comes from a long line of lefties) and most lucets come with a tutorial on how to use them, as there are several ways. As a result, I'm going to leave out the specific steps we use. It's not difficult and with practice it becomes an effortless task driven by muscle memory.

Right now, we do a combination of modeling and working with assistance to create these cords, so that is what we did here. Also, I tell my preschooler a story as she is working with the lucet. That narrative, about a couple sheep, reinforces the knowledge of the hand movements and the path of the yarn as she is working.


Step 6: Put it all Together
The child will thread their needle using a felt sewing needle, a needle threader, and some blue embroidery floss. Finally, secure the cord to the heart, creating a loop.

In Conclusion
This Hanging Heart Pillow is sure to be a hit with your family. We hope you enjoy making one in your homeschool. If you make this heart shaped pillow, let us know how it went!
Curriculum Resource for Montessori Sewing
- Sewing in the Montessori Classroom: A Practical Life Curriculum - all the fundamentals for implementing a Montessori sewing curriculum using Montessori philosophy, including some project ideas
More Seasonal
How To Make a Hanging Heart Pillow

Whether you're looking to make a heart ornament, a world globe ornament, or a mixture of both to decorate your home year round, this tutorial will show you how to make a hanging heart shaped pillow in your homeschool. Covers heart pillow sewing pattern all the way to cord making with a lucet. Sewing lessons are part of the Montessori Practical Life curriculum.
Materials
- Heart Pattern
- Continents Pattern
- Wool Felt (including 2 different blues and Montessori continent colors)
- Double Knitting Yarn
- Pincushion
- Small Montessori Tray
- Eco Wool Batting
- Nontoxic Craft Glue
- Blue Embroidery Floss
Tools
- Craft Scissors
- Pin to Secure Felt
- Gold Eye Felt Sewing Needle
- Needle Threader
- Child's Safety Scissors
- Lucet
Instructions
- Using the heart pattern, the child will trace the heart shape onto two pieces of blue felt (light and dark blue) and cut them out. This doesn’t have to be a really precise cut because the hearts will be turned inside out and shaped using the child’s fingers after they are sewn together.
- Assist the child as needed to secure the hearts together with a pin and placed them on the tray with the other sewing materials.
- The child will use the needle threader to thread the felt sewing needle. Having a pincushion that attracts the child’s interest may help for this step. The pretty gold elephant pincushion and the excitement of using a felt sewing needle made this very enticing work for our preschooler.
- Afterwards, the child can create a knot at the ends of the thread. If this skill has not yet been mastered, you may want to assist during this part of the work.
- Push down through the light blue, pull. Up through the dark blue, pull. We used this narrative to guide the work of the running stitch.
- When your preschooler is done with this work for the day, they can return the needle to the pincushion and place both the pincushion and their work back on the tray. Our tray was placed on a high shelf to keep out of the reach of some other small, curious hands.
- During the next session, the child will sew the perimeter of the hearts together, leaving just enough space (approx. 2″) to reverse the heart so the stitches are inside and stuff with wool batting. Our daughter’s small fingers were perfect for this task and she didn’t require any of the tools that adults typically use to accomplish the same thing.
- Once satisfied with the amount of wool batting inside, the child will work the seams of the heart to create the desired shape.
- Use craft glue to seal the remaining 2″ opening and glue the continent appliques to each side of the heart. (An older child may choose to sew these appliques on for added detail.
- Use the directions that come with the lucet to learn how to use it, as there are several ways. It’s not difficult and with practice it becomes an effortless task driven by muscle memory.
- The child will thread their needle using a felt sewing needle, a needle threader, and some blue embroidery floss. Finally, secure the cord to the heart, creating a loop.
Notes
Full tutorial and pictures at: https://happyhomeschooladventures.com/heart-pillow/
Supplies can be purchased at: https://achildsdream.com/

Leave a Reply