"The importance of the work does not bother children, they are satisfied when they have done as much as they can and see that they are not excluded from an opportunity to exert themselves in their surroundings. The most admired work is that which offers the greatest opportunities to each one."
- Maria Montessori
We're continuing on with our nature adventures and the process of starting a kids' gardening program in our homeschool. This time we're talking about soil temperature and soil pH.
Disclosure of Material Connection: Some of the links in the post are "affiliate links." This means if you click on the link and purchase the item, I will receive an affiliate commission. Amazon links are not affiliate links. You can read my full affiliate disclosure.
Outdoor Practical Life
We are moving right along in the process of starting our PNW vegetable garden so we thought we'd share some of what our family has been up to this week: obtaining the soil temperature and DIY soil pH testing.

Soil Temperature Testing
Materials
- Indoor/Outdoor Thermometer
Procedure
To check the soil temperature, we grabbed our trusty Indoor/Outdoor Thermometer and placed the probe about 5" deep into the soil to record an accurate temperature. We obtained an AM temp and a PM temp to get an average soil temp for our garden site:
56 and 60 => 58 deg F
This is a good starting soil temp for us, and it assists our planning of what vegetables to direct seed and what to start indoors.
Next, we moved on to my favorite part: DIY soil pH testing. But first, I digress for a moment.
Some Background on Intentional Work
It's interesting how much our life experiences can really encourage our long-term interests. My favorite class in high school was Chemistry. The lab desk next to me was missing a huge chunk of countertop that my teacher jokingly referred to as the result of "a demo gone wrong". My teacher was inspiring and funny, and he was great at keeping the student's interests up, with experiments that included shooting DIY bottle rockets off in the lobby. He wore 15-year-old cargo pants that were no longer in style and he spent summers working in a lab that focuses on breast cancer research. He inspired all of us to care about and like chemistry, which was pretty impressive for a group of upperclassmen who were too cool for school.
Later in life, I got my B.S. in Chemical Oceanography and organic chemistry was my favorite lab. It lasted a year total and I was always waiting for someone to blow something up, which never happened, but it was still cool to see all the physical and chemical changes that occur under the right conditions and with the right chemicals.
I also had the privilege of working for two very accomplished and inspiring chemical oceanographers. I really enjoyed that time spent in the lab. When my kids are older, I hope that they will have the ability to participate in a mentorship in some area that they find as meaningful and inspiring as I did during my time as a research assistant and a high school chemistry student. And if they can afford to live off of that salary, even better.
For now, I strive for meaning, inspiration, and fun in all that we do. Now, back to the experiment.
DIY Soil pH Testing
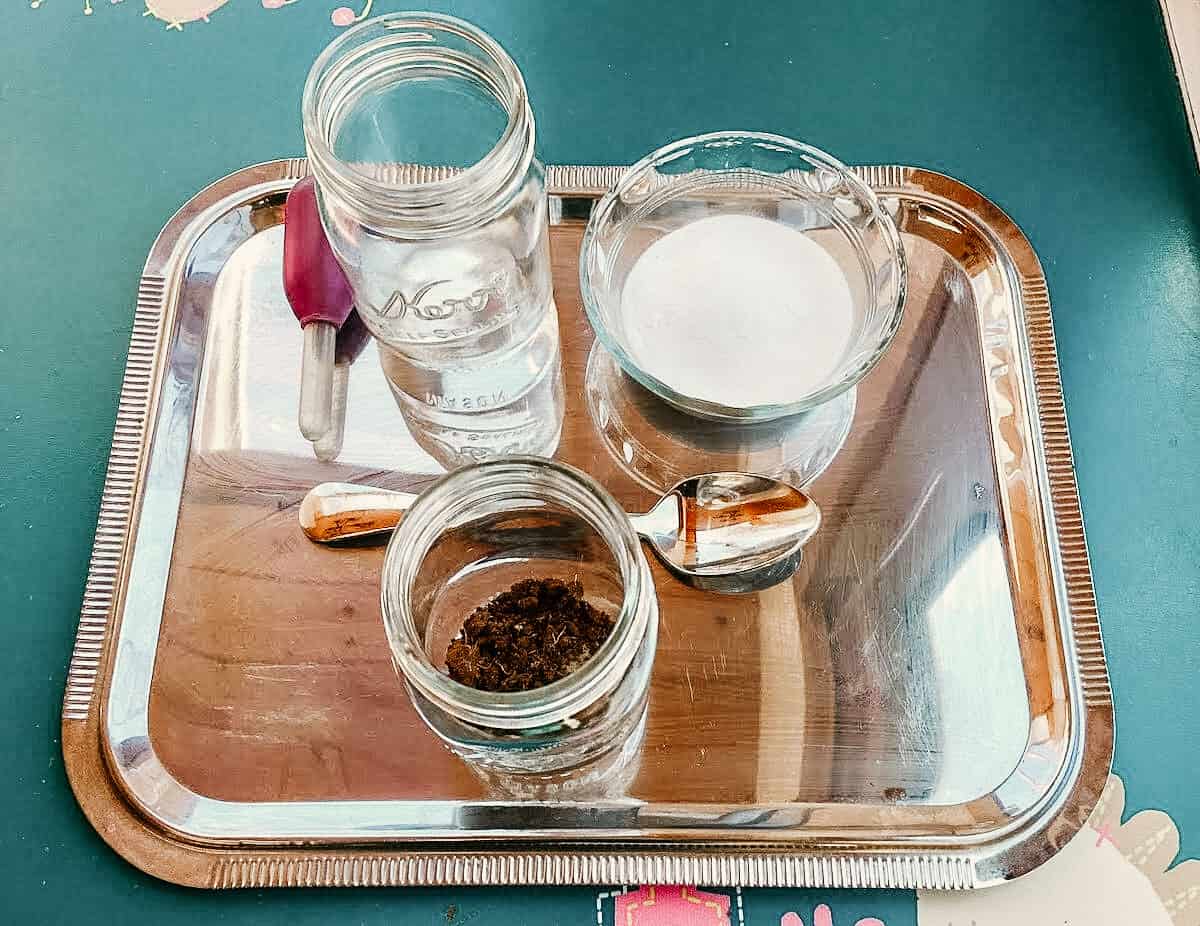
Materials
- Distilled Water
- Baking Soda
- White Vinegar
- Jumbo Dropper
- Kitchen Scale
- Mason Jars
- Tray
First, we needed to test the acidity of the soil.
Making Distilled Water for DIY Soil pH Testing
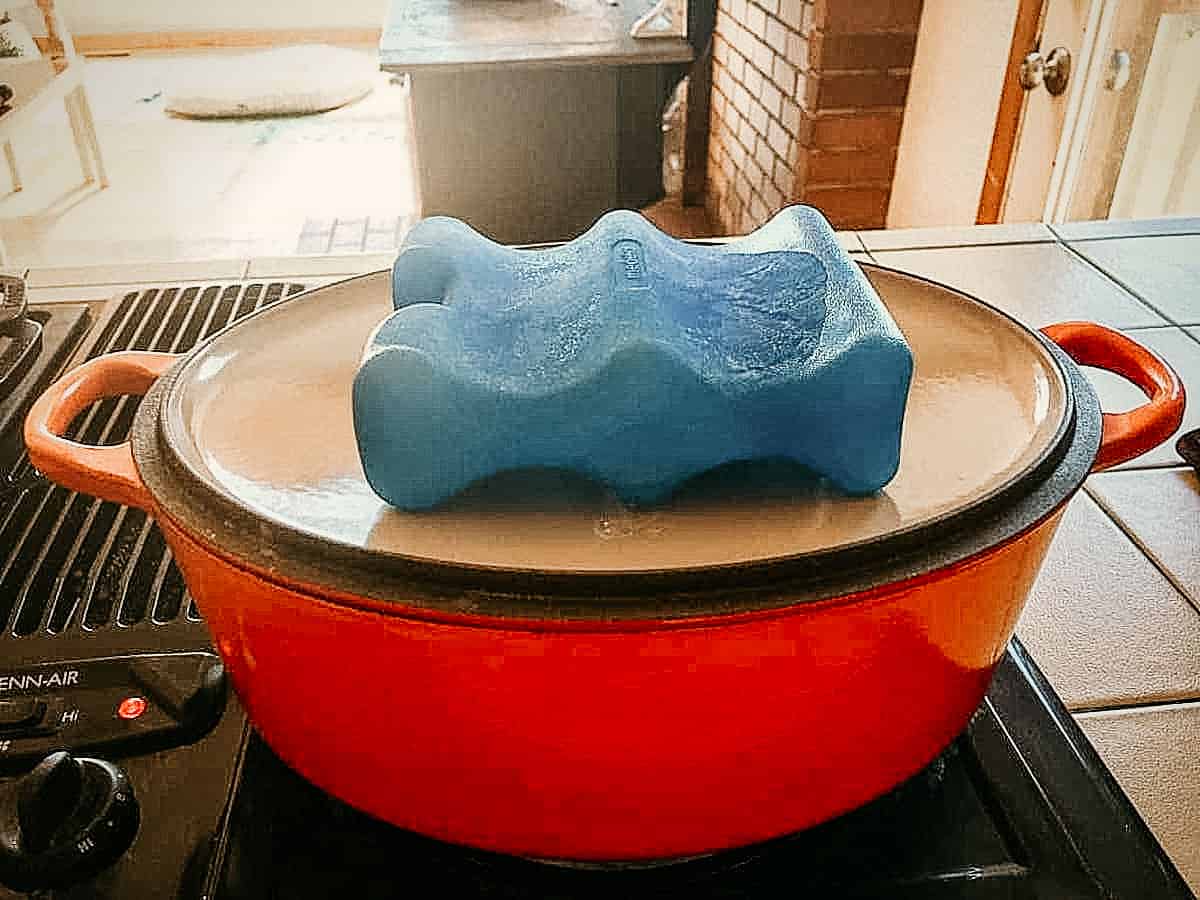
In order to test acidity, we also needed distilled water. We opted to make our distilled water at home rather than purchasing it, using our dutch oven, a glass bowl, tap water, an ice pack, and the stove. This is a great method if you only need a small amount of water, as we did for this experiment. It's very time consuming otherwise.
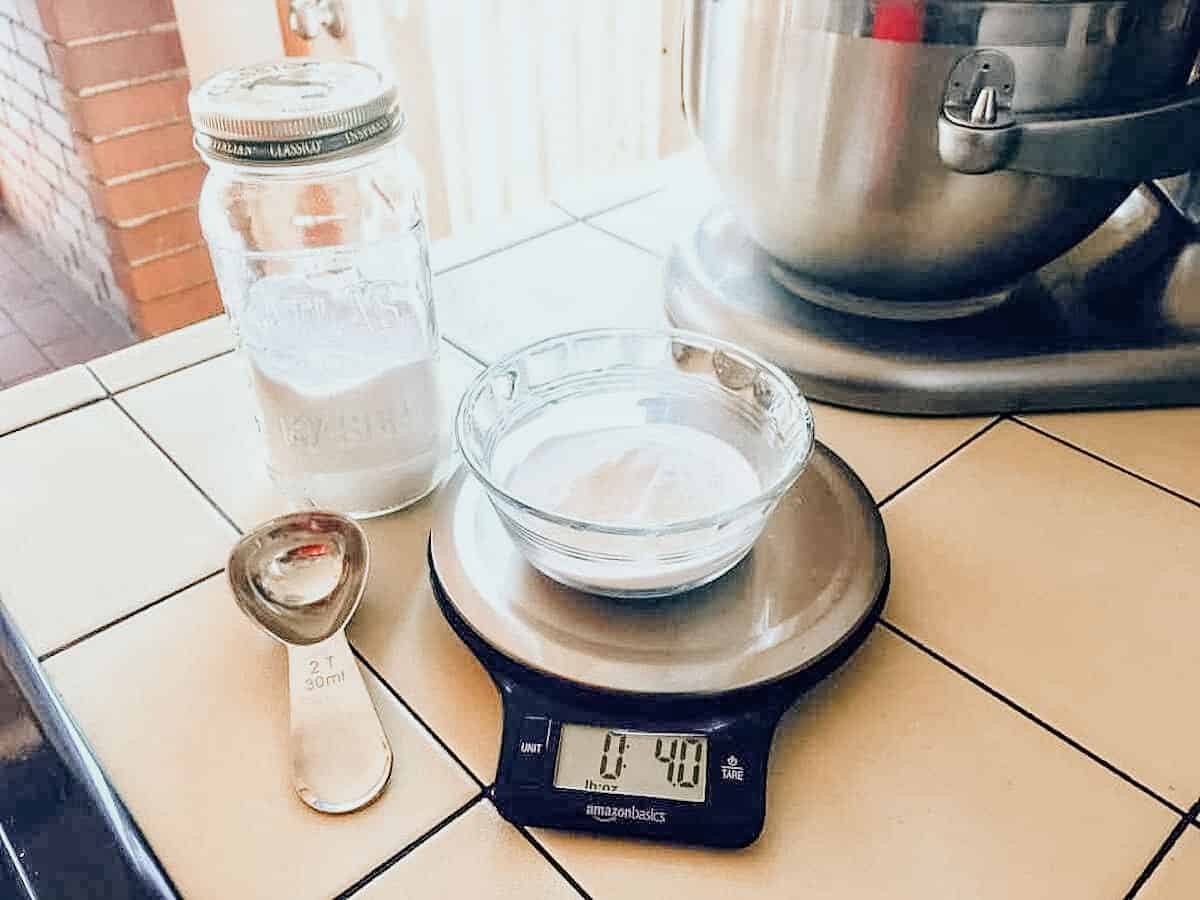
Measuring Ingredients for DIY Soil pH Testing
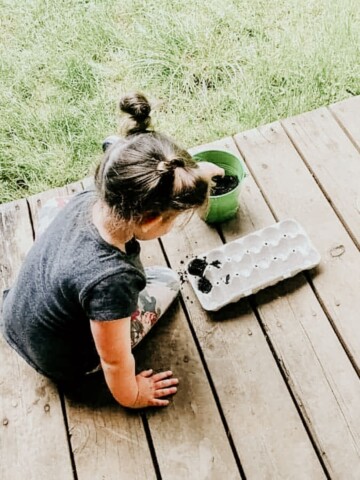
Kaia measured 4 oz. of baking soda using our kitchen scale, and we added it to their Montessori tray.
Depending on the number and the age of the children, this could be an individual or cooperative lesson. The kids are very into cooperative play right now, so this experiment is set up for them to work on together.
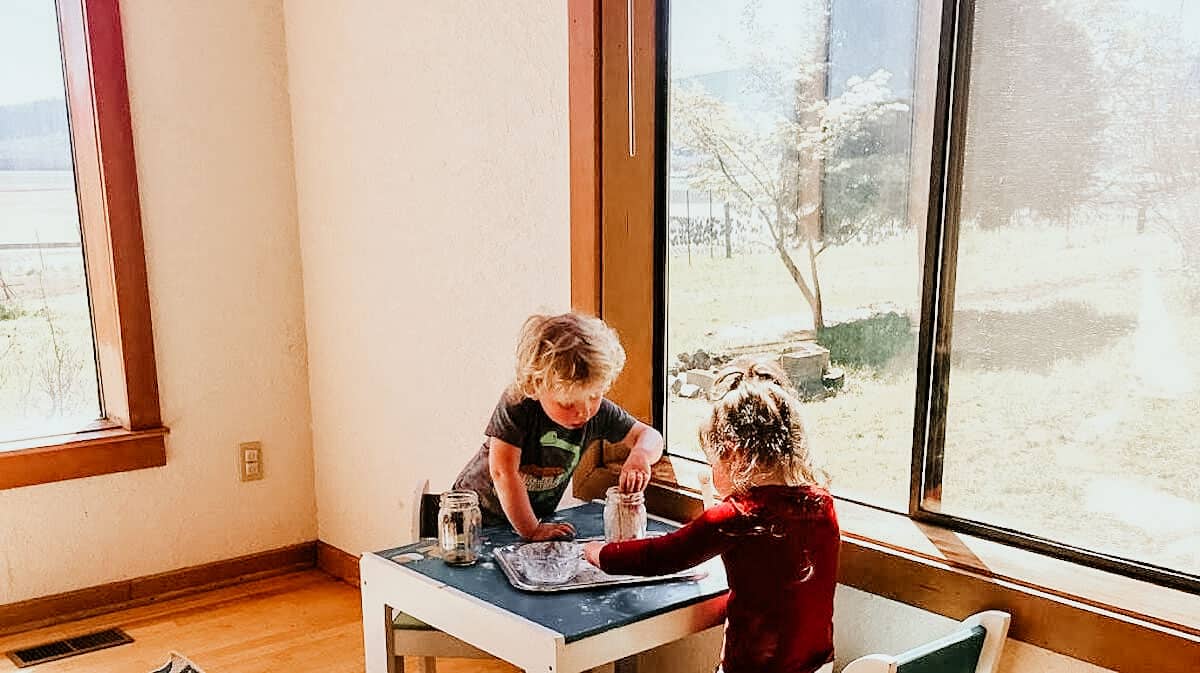
Procedure for DIY Soil pH Testing
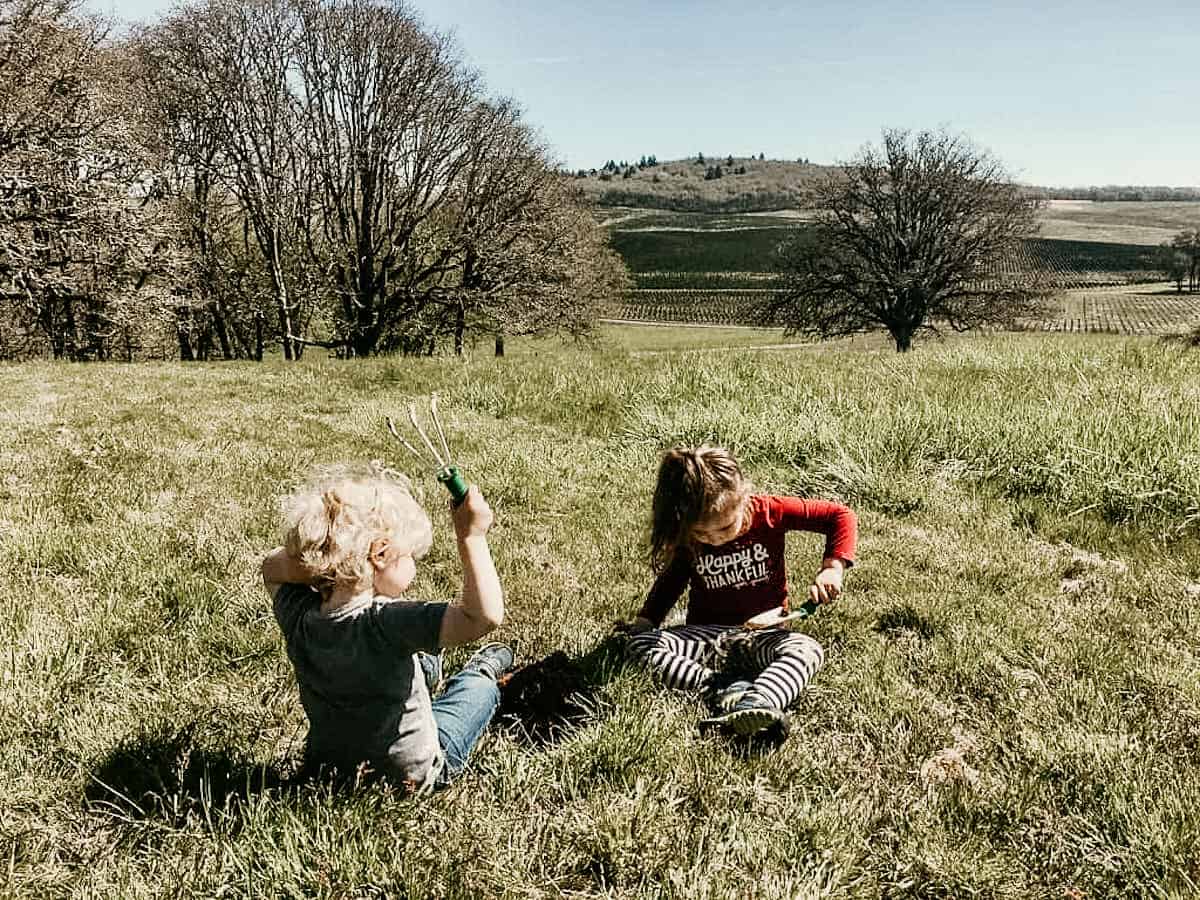
In order to complete our DIY soil pH testing, Kaia used the pipette to add distilled water to the soil sample until it formed a mud consistency. Noah then assisted his older sister in adding all the baking soda to the soil/distilled water mixture. and mixing it with a spoon. There was no reaction when the baking soda was added, suggesting the soil has a pH greater than 6. If it were to fizz, the soil most likely has a pH between 5 and 6.
Once they were done testing the acidity, Noah spent about 20 minutes using the pipette to transfer the remaining distilled water between all the mason jars and he thoroughly enjoyed himself. A pipette is also great tool to use for color mixing works. Our kids love this thing.
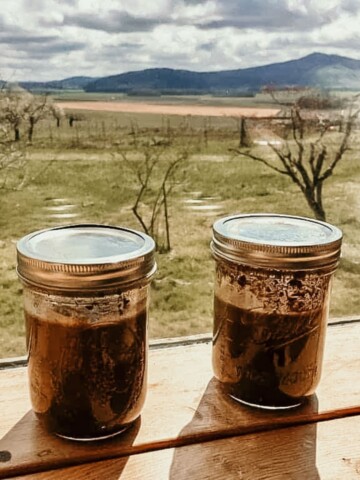
Next, we moved on to testing the alkalinity of our soil, using 2 teaspoon of fresh soil from our garden site and some vinegar. Kaia used the kitchen scale again to measure 4 oz. of white vinegar and we set up our tray again. There was no reaction when our kids added the vinegar to the soil sample, suggesting a pH less than or equal to 7. If it were to fizz, the pH is between 7 and 8.
Conclusions About Our Soil
As I mentioned in our last post, we live on Jory soil, which can be slightly to moderately acidic. Moderately acidic soil usually benefits from soil amendments such as lime, to increase the pH. Overall, we can conclude that our soil's pH is between 6 and 7, or mildly acidic to neutral, which means our garden should be content with regular infusions of aged compost and some organic mulch; no lime necessary.
What's the Next Step After DIY Soil pH Testing?
Now that the kids have identified our soil temperature and our soil's pH, we are moving on to the fun part: establishing the bed.
As our kids get all their tools together, in anticipation of some serious digging, we're going to stop here.
More Outdoor Practical Life in the Garden
- Outdoor Practical Life: Composition Test & Sediment Jars
- Vegetable Garden Beds: Establishment & DIY Compost
- Vegetable Garden: Sun, Soil, Air, & Water… & Deer
- Montessori Gardening: Empower Kids to Grow Their Own Food & Eat Healthy - Farm to Table
Soil Temperature and Soil pH Testing With Kids
Montessori Outdoor Practical Life Activity: Soil temperature and DIY soil pH testing. Great homeschool gardening and science lesson for kids.
Materials
- Soil Sample
- Thermometer
- Distilled Water
- Baking Soda
- White Vinegar
- Jumbo Dropper
- Kitchen Scale
- Mason Jars
- Tray
Tools
- See Materials List
Instructions
- Record the AM and PM temperatures of your soil so you can take the average of the two temperatures. Place the tip or probe on your thermometer about 5" deep into the soil to record an accurate temperature.
- To test the acidity of the soil, measure 4 ounces of baking soda using the kitchen scale.
- Use the pipette to add distilled water to the soil sample until it forms a mud consistency.
- Add all the baking soda to the soil - distilled water mixture, and mix it with a spoon.
- If there is no reaction when the baking soda is added, the soil likely has a pH greater than 6. If it were to fizz, the soil most likely has a pH between 5 and 6.
- To test the alkalinity, measure 4 ounces of white vinegar.
- Use 2 teaspoons of fresh soil from your garden site and combine it with the white vinegar. Give it a stir.
- If there is no reaction, the soil likely has a pH less than or equal to 7. If it were to fizz, the pH is between 7 and 8.
- Based on the soil temperature, you should start to get a picture of what you can plan on planting in your garden beds now, and what you should start indoors.
- The soil pH will help you determine what amendments, if any, should be added to your soil.
Notes
- Full lesson and instructions at: https://happyhomeschooladventures.com/outdoor-practical-life-pnw-vegetable-garden-soil-temp-diy-soil-ph-test/
- Learn about soil amendments: https://www.almanac.com/organic-soil-amendments-explained

Leave a Reply